Deep gratitude to Mr. Enrico, the founder of GDSP, who allowed us to open and talk about his OS. He build really excellent OpenWrt system on R5000 5G Router. If you also prefer OpenWrt, you can try as the following steps. Hope it’s helpful.
0. What is GDSP?
—————-
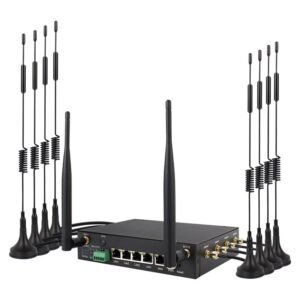
The GDSP (General Digital Signal Processor) is an hacking-friendly 5G router device based on the MT7981 SoC.
The device ships with stock OpenWrt pre-installed, and an open source U-Boot bootloader based on OpenWrt.
Support for this device is present since OpenWrt 24.10.
Main hilights:
1 – Fully supported: you can compile almost everything from source code[1] (bootchain and OS firmware).
This allows the user a complete customization of the device.
2 – User friendly: the production bootloader image offers some services to make playing with the device easier and safer,
allowing also easier recovery and software testing.
3 – Audio capabilities: the pre-installed 5G modem(s) ship with a firmware with enabled and confirmed working audio capabilities.
[1]: usual restrictions apply: DDR calibration code is distributed as a binary .o file, and Mediatek bootrom (not stored in flash) is left in-place.
Furthermore, the firmware running in 5G modules remains proprietary.
1. Hardware design notes
——————
SoC: Mediatek MT7981BA
RAM: 256MB DDR3
Flash: SPI-NOR 32 MiB (Winbond W25Q256)
WLAN: MT7976CN DBDC AX Wi-Fi
Switch: MT7531AE (4x LAN Gigabit ports, 1x WAN Gigabit port)
5G: Quectel RM520N modem; the firmware shipped within the pre-installed modules is confirmed to work with audio, rendering the GDSP suitable to build solutions involving voice calls management.
Watchdog: an external WDT connected to GPIO 6 is present and always running; the built-in Mediatek watchdog is also present and effective.
UART: the primary UART is not exposed; to access it you will need to open the case (see section 4.3).
The UART you find exposed is actually a seconary port (not ttyS0 in Linux terms).
Available configurations:
a – GPS version: GPS is present and accessible via /dev/ttyS1;
OR
b – MMC support: TF card reader available.
Note that 5G modem “modem2” is NOT power-cycled or reset when rebooting the system, contrarily to “modem1”.
You may consider editing your DTS file to avoid excessive “modem1” power-cycling during development.
This can be useful to prevent excessive 5G modules flash writes when playing with the device and causing it to reboot too frequently, but should be kept in mind when diagnosing 5G modem(s) related issues.
2. Usage
——–
2.1. Preparation
—————-
Before experimenting with the device, it is important to take a backup copy of the Factory parttion that holds calibration data unique to your device.
Losing the content of this partition may render Wi-Fi inoperable and prevent the device from using the correct MAC addresses.
Being this data unique to each device sample, nobody can recover it for you in case you lose it.
To perform such a backup, you may use an SSH client in the terminal.
a – Connect to the device:
$ ssh root@192.168.1.1
b – Locate the Factory partition:
# cat /proc/mtd
The output may look like this:
mtd0: 00040000 00010000 “BL2”
mtd1: 00010000 00010000 “u-boot-env”
mtd2: 000b0000 00010000 “Factory”
mtd3: 00080000 00010000 “FIP”
mtd4: 01e80000 00010000 “firmware”
mtd5: 01400000 00010000 “rootfs_data”
c – From the terminal, you may dump the content of the Factory partition as follows:
$ ssh root@192.168.1.1 cat /dev/mtd2 >Factory.bin
d – Make sure you store this file on a safe place.
Note: it is advisable to backup all the patitions in the system to facilitate restoring to a known version/state; this is particularly important if you are using the non re-branded version of the device.
3. Hacking and development
————————–
The GDSP software is designed to allow for extreme customization and to make it easy for you to experiment.
If you decide to base your project upon the GDSP device, you will get instant access to the OpenWrt ecosystem (not an OpenWrt fork) and will be able to run up to date software all the time.
Just clone the OpenWrt buildroot environment and let the adventure begin!
3.1. The production U-Boot bootloader
————————————-
The production U-Boot bootloader is based on the OpenWrt bootloader, with the following changes applied (dollar sign “$” denotes U-Boot environment variables here)
– tries to load an initramfs image via TFTP at startup; it will try $gdsp_tftp_tries (3 times by default, the variable is interpreted as an hex number);
– incrase the time the bootloader waits before proceeding with it’s operations to facilitate interaction.
Setting the $gdsp_tftp_tries variable to 0x0 (or removing it from the environment) will disable TFTP download of initramfs images.
This will make the production bootloader behave as the stock OpenWrt-based one.
3.1.1. Boot media selection
—————————
When the board has been configured to support the TF card reader, the bootloader may be configured to boot the system from a firmware image stored on an SD card.
Setting the U-Boot “bootmedia” environment variable to “sd” will cause the bootloader to attempt SD booting:
# fw_setenv bootmedia sd
Should the “bootmedia” variable be absent or it’s content not recognized as valid (e.g., does not contain “nor” or “sd”), NOR boot will be attempted.
Note: altough you may edit the “bootconf” environment variable to describe your device variant, the production bootloader will always switch to the
config-1#mt7981b-gatonetworks-gdsp-sd
configuration to allow for SD card access during automatic initramfs recovery.
3.1.2. Recovery
—————
When using the production U-Boot bootloader image, you may recover the system in several ways, including:
Method 1 – Keeping the reset button pressed while plugging power for some seconds, until you can observe the device sending out TFTP requests for file “openwrt-mediatek-filogic-gatonetworks_gdsp-initramfs-kernel.bin”.
This approach should lead to your environment be reset to it’s default state.
This method works with the “stock” OpenWrt-based U-Boot bootloader as well.
Method 2 – Assuming the default configuration, the system will try to load an initramfs image via TFTP every time it starts up, so you may configure your TFTP server to server the
“openwrt-mediatek-filogic-gatonetworks_gdsp-initramfs-kernel.bin” image and reboot / power cycle the device.
Note: given a sufficiently messed up U-Boot environment, it may not be possible to recover your device with the described methods. However, it should still be possible via the mtk_uartboot tool; opening the case will be required
(see section 4.1).
3.1.3. Building the production U-Boot bootloader
————————————————
Along with this file, you should have received a copy of the patches used to build the production U-Boot image (see “patches” folder in this repository).
To build the production bootloader, you may proceed as follows:
1 – Place the provided patches in the OpenWrt buildroot, under the
package/boot/uboot-mediatek/patches
subfolder.
2 – Proceed with normal build process. Upon a succesful process completion, you should find the appropriate BL2 and U-Boot images under the OpenWrt buildroot bin folder for this target (MT7981, so bin/targets/mediatek/filogic).
3.2. OpenWrt stock U-Boot bootloader
————————————
The OpenWrt-based U-Boot bootloader offers the same set of features as the production one but with different defaults (see section 3.1).
Replacing the bootloader will allow you to customize the default U-Boot environment, securing the device as you see fit for your particular use-case.
3.2.1. Replacing the bootloader with OpenWrt stock U-Boot
———————————————————
1 – Remove the read-only flags from relevant partitions:
To replace the U-Boot bootloader, you will need to get rid of the read-only flags covering the two flash partitions we are going to modify: “BL2” and “FIP”.
Here we report (again) the flash layout of the device:
root@GatoDispera:~# cat /proc/mtd
dev: size erasesize name
mtd0: 00040000 00010000 “BL2”
mtd1: 00010000 00010000 “u-boot-env”
mtd2: 000b0000 00010000 “Factory”
mtd3: 00080000 00010000 “FIP”
mtd4: 01e80000 00010000 “firmware”
mtd5: 01400000 00010000 “rootfs_data”
root@GatoDispera:~#
We describe here two methods for removing these flags:
a – Use mtd-rw
This may be the fastest way, depending on your current setup.
a.1. Install the kmod-mtd-rw package via the APK package manager:
apk update && apk add kmod-mtd-rw
(note – the update step may not be needed).
a.2. Insert the module in the running kernel:
insmod mtd-rw i_want_a_brick=1
b – Using an initramfs image (e.g.: when running the production bootloader image)
You may modify the DTS file used by the GDSP device in the OpenWrt buildroot, removing the “read-only” property from the relevant partitions.
It is recommended to leave the “Factory” partition as read-only to avoid accidentally erasing or otherwise altering it’s contents.
You may then proceed with a recompilation and point your TFTP server to the bin/targets/mediatek/filogic/ subfolder of the buildroot environment and rebooting the GDSP.
Assuming the expected network setup, the bootloader will download the initramfs image from the TFTP server and attempt booting from it.
At this point, you will be able to modify the relevant partitions.
2 – Updating the bootchain
Here we will proceed with the actual writing of the new components to flash memory.
Should any of the following commands not complete succesfully, it is important to stop the procedure and understand why. Rebooting the device in the wrong moment will lead to ZeroFun times.
a – Erase the environment
Command: mtd erase u-boot-env
Reason: you may be flashing a bootloader with different capabilities and/or default environment.
You may wish for the bootloader to re-run the relevant instructions in the environment, rebuilding it.
You may decide to perform or skip this command depending on the circumstances.
Wiping the environment is recommended if you are switching from production to stock bootloader or back.
If switching to a Mediatek SDK based bootloader, restoring the environment originally present with that bootloader is a good idea (e.g.: on a non re-branded device).
The same holds true when switching from a Mediatek SDK based U-Boot to an OpenWrt-based one, which will fail to understand commands like “mtkboardboot”, and drop you to a shell.
Command: mtd erase BL2
Reason: erase BL2 ATF (ARM Trusted Firmware) flash area, in preparation of updating it later;
Command: mtd erase FIP
Reason: erase U-Boot bootloader flash area;
Command: mtd write openwrt-mediatek-filogic-gatonetworks_gdsp-preloader.bin BL2
Reason: update ATF; not necessary but highly recommended.
Command: mtd write openwrt-mediatek-filogic-gatonetworks_gdsp-bl31-uboot.fip FIP
Reason: update bootloader flash area with new (compressed) FIP image.
Now, be brave and reboot the system! 🙂
If something went wrong, see section 4.1 of this document and look for a screwdriver.
3.2.2. Recovery via stock OpenWrt U-Boot bootloader
—————————————————
See section 3.1.3 of this documen, recovery method 1 (keeping the reset button pressed should lead to TFTP recovery).
Automatic initramfs images loading won’t be available, unless the environment was modified appropriately.
3.3. Custom U-Boot bootloader
—————————–
Unless you are performing some small tweaks, the initial testing and configuration of a custom bootloader will require primary UART access.
Note: do not forget you should constantly poke the external watchdog on GPIO 6 to prevent periodic system reset!
3.3.1. Testing a custom U-Boot binary in RAM
——————————————–
Here we’ll use the upstream U-Boot tree with OpenWrt paches applied to demostrate how you may test a slightly tweaked U-Boot binary without flashing it.
If the new binary crashes the WDT will reset the system eventually, giving you a new chance to break things. 🙂
1 – Prepare your U-Boot tre: cloning it
$ git clone https://source.denx.de/u-boot/u-boot
Then apply the OpenWrt patches e.g.: using “git am” command or the method you prefer.
[mrkiko@rivendell u-boot]$ cat /home/mrkiko/openwrt_stuff/openwrt/package/boot/uboot-mediatek/patches/* | git am
Applying: clk: mediatek: mt7629: fix parent clock of some top clock muxes
Applying: arm: dts: mt7629: fix sgmii clock selection for ethernet
Applying: net: mediatek: use correct register field for SGMII speed selection
Applying: net: mediatek: correct register name of ethsys syscfg1
Applying: net: mediatek: fix sgmii selection for mt7622
Applying: net: mediatek: fix gmac2 usability for mt7629
Applying: net: mediatek: add support for 10GBASE-R
Applying: net: mediatek: make sgmii/usxgmii optional
Applying: net: mediatek: don’t enable GDMA cpu bridge unconditionally for NETSYSv3
Applying: net: mediatek: fix usability with wget command
Applying: net: mediatek: split ethernet switch code from mtk_eth.c
Applying: net: mediatek: add support for MediaTek MT7987 SoC
Applying: net: mediatek: add support for Airoha AN8855 ethernet switch
Applying: board: mediatek: mt7622: remove board_late_init
Applying: clk: mediatek: fix uninitialized fields issue in INFRA_MUX struct
Applying: configs: mt7629: move image load address to 0x42000000
Applying: configs: mt7988: move image load address to 0x44000000
Applying: spi: mtk_spim: add support to use DT live tree
Applying: spi: mtk_spim: check slave device mode in spi-mem’s supports_op
Applying: arm: dts: mediatek: add quad mode capabilities for SPI flashes
Applying: pwm: mediatek: add pwm3 support for mt7981
Applying: pci: mediatek: add support for multiple ports in mediatek pcie gen3 driver
Applying: arm: dts: mediatek: add pcie support for mt7988
Applying: arm: dts: medaitek: fix internal switch link speed of mt7988
Applying: arm: dts: mediatek: add support for all three GMACs for mt7988
Applying: arm: dts: medaitek: add flash interface driving settings for mt7988
Applying: arm: dts: mediatek: update mt7981 mmc node
Applying: MAINTAINERS: update file list for MediaTek ARM platform
Applying: pinctrl: mediatek: update mt7981 pinctrl driver based on upstream kernel
Applying: drivers: mtd: add support for MediaTek SPI-NAND flash controller
Applying: mtd: mtk-snand: add support for SPL
Applying: env: add support for generic MTD device
Applying: mtd: add a new mtd device type for NMBM
Applying: mtd: add core facility code of NMBM
Applying: mtd: nmbm: add support for mtd
Applying: common: board_r: add support to initialize NMBM after nand initialization
Applying: cmd: add nmbm command
Applying: cmd: mtd: add markbad subcommand for NMBM testing
Applying: env: add support for NMBM upper MTD layer
Applying: mtd: mtk-snand: add NMBM support for SPL
Applying: cmd: add a new command for NAND flash debugging
Applying: mtd: spi-nor: add support to read flash unique ID
Applying: cmd: sf: add support to read flash unique ID
Applying: cmd: bootmenu: add ability to select item by shortkey
Applying: common: spl: spl_nand: enable CONFIG_SYS_NAND_U_BOOT_OFFS undefined
Applying: board: mt7629: add support for booting from SPI-NAND
Applying: board: mt7622: use new spi-nand driver
Applying: board: mt7981: add reference board using new spi-nand driver
Applying: mtd: spi-nor: add more flash ids
Applying: mtd: spi-nand: backport from upstream kernel
Applying: mmc: mtk-sd: add support to display verbose error log
Applying: cmd: ubi: make volume find/create/remove APIs public
Applying: cmd: ubi: allow creating volume with all free spaces
Applying: env: ubi: add support to create environment volume if it does not exist
Applying: mtd: ubi: add support for UBI end-of-filesystem marker used by OpenWrt
Applying: board: mediatek: wire-up NMBM support
Applying: mtd: spinand: add support for FORESEE F35SQA002G
Applying: mtd: spinand: add support for FORESEE F35SQA001G
Applying: net: phy: add support for Airoha ethernet PHY driver
.git/rebase-apply/patch:1866: new blank line at EOF.
+
warning: 1 line adds whitespace errors.
Applying: image-fdt: save name of FIT configuration in ‘/chosen’ node
Applying: mt7981.dtsi: add USB nodes
.git/rebase-apply/patch:153: space before tab in indent.
env_relocate();
.git/rebase-apply/patch:154: space before tab in indent.
return 0;
warning: 2 lines add whitespace errors.
Applying: configs: mt7622: enable environment for mt7622_rfb
Applying: add support for RAVPower RP-WD009
.git/rebase-apply/patch:5560: new blank line at EOF.
+
warning: 1 line adds whitespace errors.
Applying: add xiaomi redmi ax6s
.git/rebase-apply/patch:1406: trailing whitespace.
warning: 1 line adds whitespace errors.
Applying: uboot-mediatek: initialized the watchdog subsystem later
Applying: add GatoNetworks GDSP
[mrkiko@rivendell u-boot]$
Note: this won’t produce a strictly correct result, also due to the fact some patches we are processing do not contain the needed headers, so some changes are applied as part of unrelated commits.
The correct approach is probably to work inside the OpenWrt buildroot and manage patches via the quilt tool.
2 – Get the appropriate toolchain: the one from OpenWrt works very well.
Here I use a local OpenWrt buildroot environment I used to compile a firmware for the GDSP.
I am prepending the toolchain binaries folder to my PATH shell variable – this is not the only working way.
PATH=/home/mrkiko/openwrt/staging_dir/toolchain-aarch64_cortex-a53_gcc-13.3.0_musl/bin/:$PATH
Note: I know, I am missing the STAGING_DIR environment variable, so the compiler will blame me! (but still compile 🙂 )
3 – Use the GDSP defconfig as starting point, then do your customizations:
$ cp configs/mt7981_gatonetworks_gdsp_defconfig .config && make menuconfig
(here I just customize the prompt).
4 – Cross-compile the bootloader:
$ make CROSS_COMPILE=aarch64-openwrt-linux- –jobs 9
on success, you should have a suitable “u-boot.bin” file.
5 – Start a TFTP server pointing to the U-Boot source tree:
sudo atftpd -v9 –logfile – –daemon –no-fork –user mrkiko –group mrkiko /home/mrkiko/u-boot/
6 – Transfer the binary: here we are at the U-Boot prompt
GDSP> tftpboot u-boot.bin
Using ethernet@15100000 device
TFTP from server 192.168.2.105; our IP address is 192.168.2.10
Filename ‘u-boot.bin’.
Load address: 0x46000000
Loading: #####################################################
8.5 MiB/s
done
Bytes transferred = 765344 (bada0 hex)
GDSP>
7 – Transfer control to the newly loaded binary via the “go” command, specifying as address the one in the $fileaddr U-Boot environment variable.
The variable has been set for us “magically”:
GDSP> echo $fileaddr
46000000
GDSP>
GDSP> go $fileaddr
## Starting application at 0x46000000 …
(Some messages are lost here, we are connected over netconsole.)
( ( ( OpenWrt ) ) ) U-Boot 2025.01-OpenWrt-r28844-3a1c19fd6b (Feb 18 2025 – 14:10:59 +0000)
1. Run default boot command.
2. Boot system via TFTP.
3. Boot system from flash.
4. Load system via TFTP then write to flash.
5. Reset all settings to factory defaults.
6. Reboot.
0. Exit
Press UP/DOWN to move, ENTER to select, ESC to quit
(“0” character sent to exit the menu)
BE_FREE>
But let’s go back to where we started from 🙂 …:
BE_FREE> reset
resetting …
Note: you are loosing lots of messages here, because (again) we are using the netconsole interface, which comes up later. All BL2 and some U-Boot messages are lost.
( ( ( OpenWrt ) ) ) U-Boot 2025.01-OpenWrt-r28844-3a1c19fd6b (Feb 18 2025 – 14:10:59 +0000)
1. Run default boot command.
2. Boot system via TFTP.
3. Boot system from flash.
4. Load system via TFTP then write to flash.
5. Reset all settings to factory defaults.
6. Reboot.
0. Exit
Press UP/DOWN to move, ENTER to select, ESC to quit
(“0” character sent to exit the menu)
GDSP>
Note that the binary we are using is not suitable to be written to the flash memory, where a FIP image should be written instead (see section 3.2.1).
To run an U-Boot binary stored into a FIP image you will need the “fiptool” program to extract the binary.
As an example, let’s extract and run the binary coming from the last succesful compilation of stock OpenWrt for the GDSP; we move into the buildroot main folder and then invoke fiptool:
$ ./build_dir/hostpkg/trusted-firmware-a-2.12/tools/fiptool/fiptool unpack bin/targets/mediatek/filogic/openwrt-mediatek-filogic-gatonetworks_gdsp-bl31-uboot.fip
Here we get two files:
nt-fw.bin # the U-Boot binary we are looking for, but XZ compressed
soc-fw.bin # not used right now.
Decompress the binary:
$ xzcat nt-fw.bin > decompressed-nt-fw.bin
So we can point our TFTP server to the OpenWrt buildroot folder and load the binary in RAM:
GDSP> tftpboot decompressed-nt-fw.bin
Using ethernet@15100000 device
TFTP from server 192.168.2.105; our IP address is 192.168.2.10
Filename ‘decompressed-nt-fw.bin’.
Load address: 0x46000000
Loading: #####################################################
7.7 MiB/s
done
Bytes transferred = 765544 (bae68 hex)
GDSP> go $fileaddr
## Starting application at 0x46000000 …
( ( ( OpenWrt ) ) ) U-Boot 2025.01-OpenWrt-r28844-3a1c19fd6b (Feb 18 2025 – 14:10:59 +0000)
1. Run default boot command.
2. Boot system via TFTP.
3. Boot system from flash.
4. Load system via TFTP then write to flash.
5. Reset all settings to factory defaults.
6. Reboot.
0. Exit
Press UP/DOWN to move, ENTER to select, ESC to quit
(“0” character sent to exit the menu)
GDSP>
Note: FIP compression support is being used here, see section 4.6.
4. Frequently (and not so frequently) asked questions
4.1. I flashed a non-working U-Boot bootloader or BL2, is it all over? (Spoiler: no!)
————————————————————————————–
The GDSP device is confirmed to be recoverable via mtk_uartboot, an amazing project! Head to
https://github.com/981213/mtk_uartboot
for usage instructions.
A suitable BL2 payload binary you can run from RAM memory (mt7981-ram-ddr3-bl2.bin) is produced during the standard OpenWrt firmware build process.
You may end up running a command along these lines:
$ ./mtk_uartboot -p mt7981-ram-ddr3-bl2.bin –aarch64 -f bl31-uboot.fip # serial port to use is auto-detected if not specified via the -s option
On success, you will find yourself into an U-Boot instance that may begin executing the instructions it finds in the environment.
So you may need to connect rapidly to the console with a terminal emulator and stop it to send new commands.
On failure, the external watchdog will kick in, giving you another chance to recover the device in some seconds. This is very handy to avoid unnecessary power-cycling and when working with a device on a remote site.
Of course, the U-Boot instance you are going to load should handle the watchdog. If it does not, you may still use the
gpio
command to poke the WDT yourself:
GDSP> gpio toggle 6
gpio: pin 6 (gpio 6) value is 0
GDSP>
4.2. Why didn’t you expose the “primary” serial port? And why connecting the 5G modems only via USB even tough they do support PCIe?
————————————————————————————————————————————
This is due to how the device is designed internally and it is not under my control. I might have more options if I am able to sell more devices.
Our manufacturer has been as kind and supportive as they could. I can not ask for more, at least for now.
4.3. What would you like to do differently in the next device?
—————————————————————
First of all, I would like to address all the points in the previous paragraph, especially exposing the “primary” serial port.
4.4. LEDs are not working as expected or at all!
————————————————
I am a blind person, so testing LEDs systematically wasn’t very easy, altough possible.
Please contact me so that we can work out a solution!
4.5. Can the flash layout be rearranged? (Spoiler: not so easily.)
——————————————————————
Altough I never tried it, I think this is feasible by patching the BL2 code.
I posed this question to myself when I noticed the U-Boot binaries I was producing at the time where too big to fit in the FIP flash partition.
Then I discovered FIP compression and everything was happyness all around. 🙂
This is why in section 3.3 we need to decompress the U-Boot binary inside the FIP image before running it from RAM.